+86 21 61767181
info@highspeeddoor.cn
 English
 Español
 Русский

In a high-intensity factory or warehouse environment, the sudden failure of an industrial door motor can paralyze an entire logistics chain. For facility managers, minimizing downtime is not just a goal—it is a financial necessity.
By implementing a structured maintenance routine and understanding the diagnostic language of your door controller, you can transition from reactive repairs to proactive efficiency.
Preventative maintenance is the secret to extending the lifespan of your "Power + Ever" drive systems. Follow these five steps to catch potential issues before they become catastrophic failures.
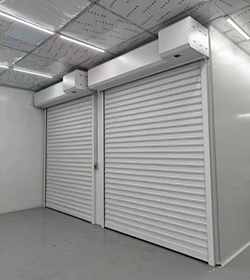
Chains & Belts: Check for excessive slack or fraying. A loose chain can cause erratic door movement and unnecessary stress on the motor shaft.
Lubrication: Regularly apply specialized industrial lubricant to the drive chain and gears. This reduces friction-generated heat and protects the motor bearings from premature wear.
Limit Precision: Ensure the door stops exactly at the designated open and closed positions. If your system uses Absolute Encoders, manual adjustment is rarely needed; however, for mechanical systems, check for loose limit screws.
Spring Balance Test: Disengage the manual clutch and lift the door by hand. If it feels unusually heavy, the counterbalance springs may be fatigued. An unbalanced door forces the motor to work harder, accelerating its aging process.
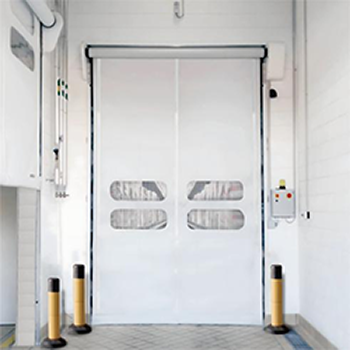
Dust Removal: Industrial environments are notoriously dusty. Accumulated dust inside the control box can cause electronic components to overheat. Use clean, compressed air to clear the circuit boards.
Motor Ventilation: Ensure the motor’s cooling fins are clear of debris to maintain optimal airflow and prevent thermal shutdowns.
Light Curtains & Radars: Wipe the lenses of your light curtains and sensors to remove dust or frost. Test the reversing mechanism to ensure the door reacts instantly to obstacles, protecting both your staff and your equipment.
Make it a habit to check the LCD panel of your controller during daily rounds. Even if the door is running, recording occasional warnings (like "Voltage Fluctuation") can help after-sales teams perform predictive analysis before a real breakdown occurs.
When a high-speed door stops moving, the digital fault code on your controller is your "First Signal for Help." Understanding these codes allows you to resolve 80% of common issues in under five minutes.
|
Description |
Recommended Action |
|
Motor Overload |
Check tracks for obstructions; ensure the motor brake is fully disengaged. |
|
Limit Error |
Inspect encoder wiring for loose connections; check mechanical limit switches for damage. |
|
Safety Trigger |
Check if the radar, floor loop, or infrared sensor is being blocked or misfired. Clean the lenses. |
|
Low Voltage Warning |
Verify the stability of the facility’s power supply and check inverter input wiring. |
|
Motor Overheat |
The door is being cycled too frequently for its rating. Allow the motor to cool and review your frequency settings. |
Whether you are using a Routine Checklist for prevention or Fault Codes for emergency repair, the goal remains the same: Guaranteed Logistics Efficiency and Safety.
Pro-Tip: We recommend printing the fault code table above and taping it to the inside of your control box. It will become your maintenance team's most valuable asset.
Company Name:Hitch (Shanghai) Automation Co.,Ltd.
Name: Lucky Gao
Mobile:15901664615
Tel:+86 21 61767181
Whatsapp:+8615901664615
Email:info@highspeeddoor.cn
Email:kevin.jiang@powever.com.cn
Add:Room 301-302, Building 1, No. 1355, Chengbei Road, Jiading District, Shanghai
Post code:201800